


You may simply set up a Mac to have a static IP address, which is another name for an IP address that does not change. You can do this by going into Network settings in OS X and changing the settings there. This may be true for wired ethernet networks and wireless networks. In this way, it can be configured to be valid under a particular network location.
What are Some Usage Cases for a Static IP Address?
You will notice static IP addresses used by devices and services that wish to be located, in addition to the IP addresses used by home and local networks. A good example of this would be DNS servers, which must always stay available to computers that use internet navigation software that requires DNS resolution services.

Another illustration of this would be accessing that does not need a domain name. You can always connect to a server by using its static IP address; this allows you to do so even if the DNS service is down or if the server does not have a domain name at all. This is especially helpful in situations involving remote access to guarantee access via an access gateway of some sort or another.
Verifying the following is necessary before you may provide a static IP address to a device
- Ensure that you are connected to the Internet and that the Mac computer is linked to one of the four (4) Ethernet ports on the router.
- Determine if the TCP/IP characteristics of the Mac machine are configured to use DHCP.
- If you want to discover the IP address of the Linksys router, check the IP settings.
- Navigate to the web-based configuration page of a Linksys router to check the DNS Server settings.
Changing an OS X computer’s IP address manually and permanently
The System Preferences may be accessed using the Apple menu.
- To access the network, hit “Network.”
- Proceed with the protocol currently used, for example, we will use Wi-Fi, so we will hit the Wi-Fi, and then we will go to the “Advanced” option that is in the bottom right corner.
- To begin, choose the TCP/IP option.
- You have several choices available for manually assigning IP addresses. For this exercise, let’s assume that you wish to keep DHCP yet have a static IP manually instead. To do this, click to menu items around Configure IPv4 and then choose – DHCP with manual address.
- Choose a static IP that won’t cause any conflicts with other components of the network. It is recommended to choose an IP address that is far outside of the typical range.
- Click the “OK” button in the upper-right-hand corner after choosing the static IP address.
- To submit changes, hit Apply.
- Your IP address will be manually indexed to the static address that you gave, and during this process, you will be disconnected from the internet for a short period.
- Finalize the network configurations and then close the System Preferences.

Your Mac has now been assigned with new static IP address, so the address won’t change even if you reset the router or reconnect it to the network. You should choose an allocated IP that is far out of the range of other devices since it will operate just well as this IP address does not clash with the IP address of another network device.
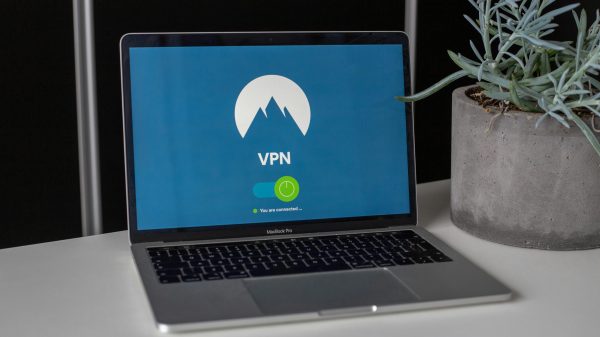
Utilize a cloud VPN that provides a static dedicated IP address
One individual or a group of users may have their very own dedicated IP address, which is fully private and is not shared with anybody else within or outside of your business. Because of this, it is suitable for a wide range of applications, including the routing of traffic and protecting remote access.
Why Make Use of a Static IP Address Via VPN?
Imagine that you require your workers to be able to access the services that you host anywhere, whether it be in the cloud, on your local network, or even in a data center. It is conceivable to make the system accessible to the general public; but, doing so would leave it open to assaults across the network.
Your customers cannot be individually identified as one of your internal workers if you do not have a virtual private network that has a static IP address. Instead, they will connect using one of the shared IP addresses their Internet service provider (ISP) provides.

Users’ IP addresses can stay consistent whenever they have a static IP address whitelisted by the server. Users can connect safely from wherever (local firewall restrictions will still apply), for this reason. A static IP address is an online ID that is unique to the user and is used for safely accessing distant systems.
However, a virtual private network (VPN) establishes a safe encrypted tunnel connection between a device and a VPN server in the chosen location. When you download VPN on your Mac, a real, static IP address is given to the user’s device, and the user’s data is sent over an encrypted tunnel at every stage of the process.
Another method to provide a static IP address to Mac OS X is
- Navigate to the Network section of System Preferences.
- Choose the Ethernet connection type.
- From the pull-down menu labeled Configure IPv4, choose Manually from the list of available options.
- Please provide the information exactly as it appeared in the answer to your help request. This information needs to contain things like the IP Address, Subnet Mask, and Router.
- After clicking the button labeled Advanced…, choose DNS from the drop-down menu that appears.
For DNS Servers, enter: 128.83.185.41 128.83.185.40
Double-check your work. If there is even a single typo, the computer cannot connect to the internet.
- To exit the setup menus completely, you may either click the OK button or the Apply button.
- Using an Ethernet connection, check to be that your computer is connected to an active ACO port before continuing. ACOs are the wall jacks that Ethernet cables are connected to when they are installed.
- The Ethernet symbol should move to the top of the list of network connection choices, and the status light next to it should turn green if your settings and the actual connection are working properly.
- Again, check your existing connection.
- If you cannot connect to the internet, double-verify the information that you entered in the Network window (Steps 1-6), and then double-check that the Ethernet cable is inserted into both your computer and a live ACO.