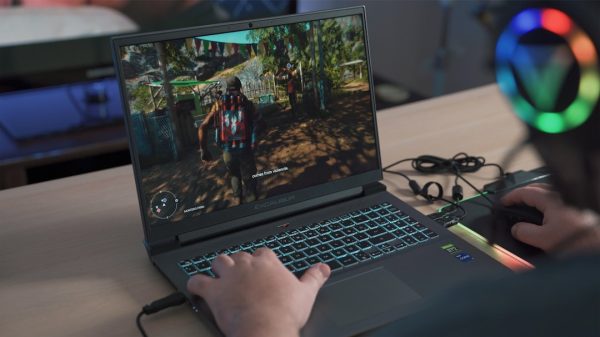


Game development has seen a significant evolution over the past two decades, making powerful tools and engines more accessible to beginners and independent developers. Among them, Unity 3D stands out as one of the most widely-used game engines in the world. Whether you’re aspiring to build a 2D mobile game, a complex 3D simulation, or an immersive virtual reality environment, Unity offers the tools and flexibility necessary to bring your vision to life.
TL;DR
Unity 3D is a powerful, beginner-friendly game engine that enables developers to create both 2D and 3D games. With its intuitive interface, asset store, and C# scripting system, it offers a great starting point for aspiring game developers. This guide walks through the basics of setting up Unity, understanding its core components, and navigating essential development practices. For newcomers, Unity’s learning curve is manageable, with many resources available for support.
Why Choose Unity 3D?
Unity isn’t just another game engine; it’s a complete development environment. It supports cross-platform deployment, from PCs and consoles to mobile devices and WebGL. Here are some compelling reasons to use Unity:
- Free for individuals and small teams – Until your revenues exceed a certain threshold, Unity Personal offers all basic features free of charge.
- Strong community and extensive documentation – Forums, documentation, and tutorials ensure you’re never alone in your development journey.
- Asset Store – Thousands of free and paid assets to jumpstart your project.
- Versatility – Supports both 2D and 3D game development, including AR/VR environments.
Getting Started with Unity
Step 1: Installing Unity Hub
Your first step is downloading and installing Unity Hub, the official launcher and manager for Unity projects and installations. From Unity Hub, you can install different versions of the Unity Editor and manage licensing and preferences. It’s advisable to install the latest Long-Term Support (LTS) version as it ensures greater stability.
Step 2: Setting Up Your First Project
Once Unity is installed, launch Unity Hub and click on “New Project”. You’ll be prompted to choose between various templates such as:
- 2D – Ideal for side-scrollers, platformers, and puzzle games.
- 3D – For shooters, simulation, or world-building projects.
- URP/HDRP – Advanced rendering pipelines for more detailed visual outcomes.
Name your project and choose a destination folder. After setting it up, Unity will create your starting workspace.
Understanding the Interface
Unity’s Editor interface can be overwhelming initially, but understanding its core panels makes it easier to work with:
- Scene View – Your work canvas. Navigate and arrange game objects here.
- Game View – See what your player will see during runtime.
- Hierarchy – Displays all the objects present in your current scene.
- Project – Contains all your assets: sprites, models, scripts, audio, etc.
- Inspector – Allows you to view or change the properties of selected game objects.
Basic Concepts in Unity
GameObjects and Components
Everything in Unity is built around GameObjects. GameObjects themselves don’t do anything until you add components to them. For example, a cube in the scene is a GameObject with a Mesh Renderer (to display the cube visually) and a Collider (so it can interact with physics).
Scripting with C#
Unity uses C# as its primary programming language. Scripts in Unity are typically added as components to GameObjects. Here’s a sample script that moves an object forward:
using UnityEngine;

public class Mover : MonoBehaviour
{
    public float speed = 5f;

    void Update()
    {
        transform.Translate(Vector3.forward * speed * Time.deltaTime);
    }
}
Save this script and drag it onto a GameObject to apply its behavior.
Adding Assets and Working with the Asset Store
Unity’s Asset Store is a huge resource for developers. You can add 3D models, UI elements, sound effects, and more—many of which are free. Downloaded assets are imported into your “Assets” folder and can be dragged directly into your scene.
You can also create your own assets or import them from external software like Blender, Photoshop, or Audacity.
Creating Your First Scene
Let’s say you want to build a simple 3D environment. Here’s a step-by-step outline:
- Add terrain from the GameObject menu by selecting 3D Object > Terrain.
- Add a character controller from Unity’s standard assets or create a capsule object and write custom movement logic.
- Apply textures to the terrain using the terrain tools available in the Inspector.
- Light the scene using directional lights and skyboxes for realism.
- Set up cameras and attach scripts if needed to follow your character.
Building and Publishing
One of Unity’s strong suits is its build and deployment system. You can export to multiple platforms with minimal modification. Here’s how to build your game:
- Go to File > Build Settings.
- Select your platform (Windows, WebGL, Android, etc.).
- Click “Add Open Scenes” to include your current scene in the build.
- Click “Build” and choose your output directory.
Depending on your platform, you might need to install specific build support modules from Unity Hub.
Best Practices for Beginners
New developers often get overwhelmed due to the vastness of game development. Here are some tips to stay grounded:
- Start small – Complete simple projects like a Pong or a maze game before tackling larger concepts.
- Organize assets – Use folders and naming conventions to keep your project clean.
- Version control – Use tools like Git to protect your work and track changes.
- Learn C# gradually – Focus on understanding core programming concepts like variables, methods, and loops before diving into complex scripts.
- Test frequently – Run your game often to test changes and debug in small intervals.
Free Resources to Learn Unity
Fortunately, Unity and its community offer a vast array of learning materials. Here are key places to get started:
- Unity Learn – Official tutorials and learning paths.
- Unity Documentation – The go-to reference for all Unity classes and components.
- YouTube – Channels like Brackeys (now archived) and Code Monkey offer excellent beginner tutorials.
- Reddit – Subreddits like r/Unity3D provide discussion and advice.
- Discord – Join Unity-focused servers to find peers and mentors.
Conclusion
Developing games with Unity 3D is both accessible and rewarding for beginners. Its flexible environment, robust community, and professional-grade features allow creators at all levels to build, test, and deploy games across multiple platforms. While the learning curve might feel steep at first, consistent practice and engagement with available resources will quickly improve your skills. Whether you aim to make the next indie hit or simply want to experiment with interactive simulations, Unity offers the tools to make your ideas playable realities.